
How to Integrate Swagger UI with Quarkus
Step 1: Set Up Your Quarkus Project
First, you need to set up a new Quarkus project. You can do this by using the Quarkus Maven plugin:
quarkus create app com.lambdacoder:swagger-quarkus --extension='resteasy-reactive'
This command creates a new Quarkus project with a REST endpoint at /hello.
Step 2: Add the Swagger UI Extension
Change current directory with
cd swagger-quarkus
Next, you need to add the Swagger UI extension to your project. You do that with Quarkus CLI:
quarkus extension add smallrye-openapi
The command above added the following dependency to your pom.xml:
    <dependency>
        <groupId>io.quarkus</groupId>
        <artifactId>quarkus-smallrye-openapi</artifactId>
    </dependency>
Step 3: Start Quarkus in development mode
quarkus dev
starts Quarkus in dev mode. Default context to swagger UI is /q/swagger-ui. So you can open it with your browser on http://localhost:8080/q/swagger-ui/.
In your browser, you should see page like this one:
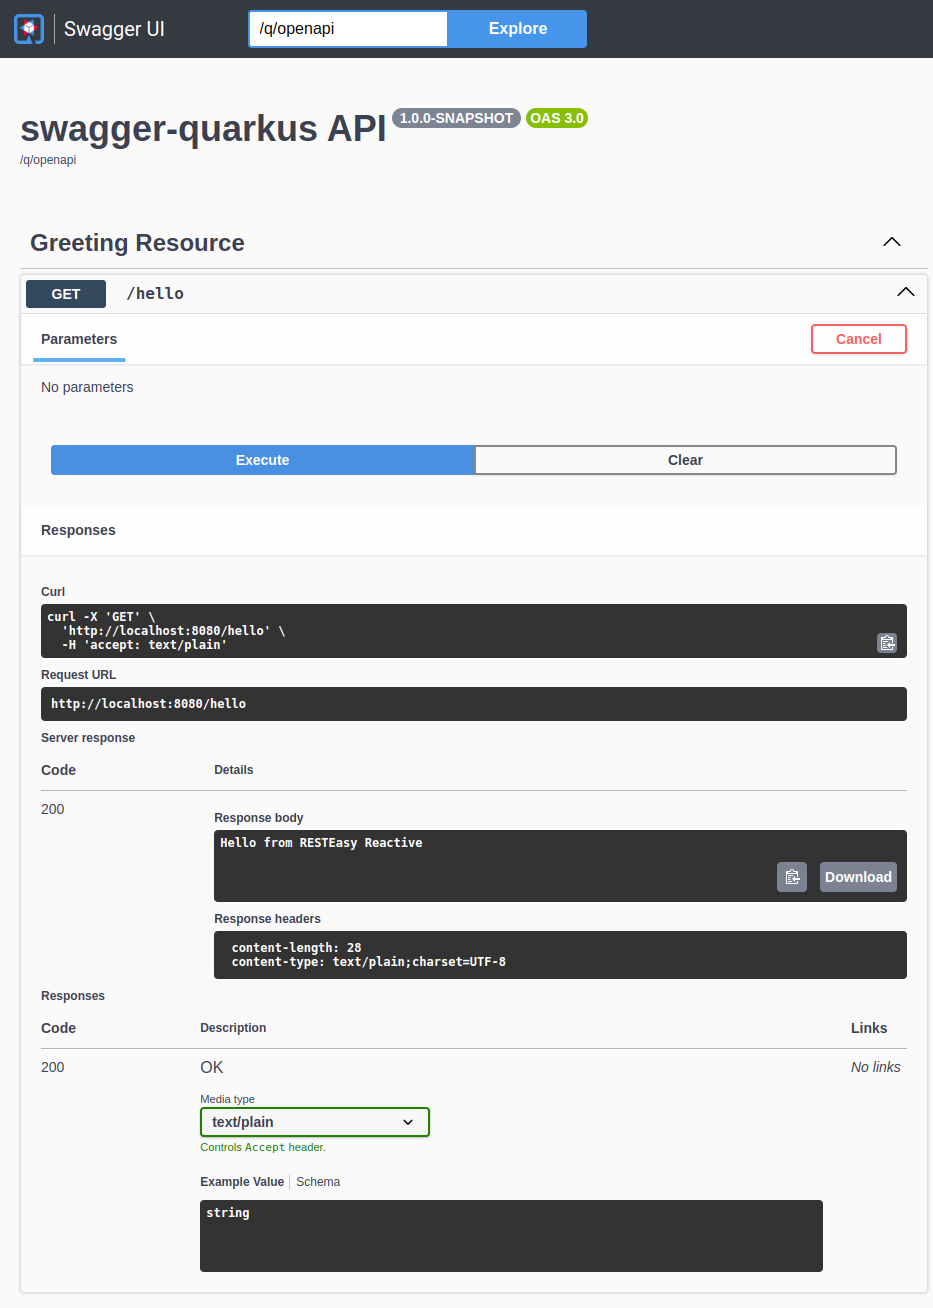
As you can see from the image above, you can invoke RESTful endpoints directly from swagger web interface. You also get curl command with parameters for execution in terminal.
Step 4: Configure Swagger UI
Now, you can configure Swagger UI if you want to change defaults. You can do this by adding properties to your application.properties file:
quarkus.swagger-ui.path=swagger
After restart of Quarkus process, your Swagger URL will be available on http://localhost:8080/q/swagger/.
Another important configuration parameter is always-include. When set to true, Swagger will be enabled also in production mode, otherwise it will be available only in development mode.
quarkus.swagger-ui.always-include=true
There are many more other configuration parameters. Please refer to official OpenAPI Swagger configuration reference.
Step 5: Document Your API
Finally, you need to document your API. You can do this by adding OpenAPI annotations to your REST endpoints. For example:
package com.lambdacoder;

import jakarta.ws.rs.GET;
import jakarta.ws.rs.Path;
import jakarta.ws.rs.Produces;
import jakarta.ws.rs.core.MediaType;
import org.eclipse.microprofile.openapi.annotations.media.Content;
import org.eclipse.microprofile.openapi.annotations.responses.APIResponse;
import org.eclipse.microprofile.openapi.annotations.tags.Tag;

@Path("/hello")
@Tag(name = "Example Greeting resource", description = "This is an example GreetingResource")
public class GreetingResource {

    @GET
    @Produces(MediaType.TEXT_PLAIN)
    @APIResponse(responseCode = "200", content = @Content(mediaType = MediaType.TEXT_PLAIN))
    public String hello() {
        return "Hello from RESTEasy Reactive";
    }
}
In this example, the @Tag annotation is used to add a tag to the endpoint, and the @APIResponse annotation is used to document the response.
That’s it! You’ve successfully added Swagger UI support to your Quarkus application. You can now use Swagger UI to explore and test your API. Happy coding! 🎉